Create a wearable
1. Requirements
Wearables live inside a collection, and in order to create a collection, you need to own a parcel. If you don’t own a parcel, you’ll either need to submit to a public collection or ask someone that owns a parcel to make a collection for you.
You're allowed to create ONE collection PER parcel owned.
You'll also need Matic or ETH (depending on collection) for every transaction. Lastly, there are community guidelines for the wearables - they can’t contain offensive racist, discriminatory, violence-endorsing or NSFW content.
2. Creating a vox model
Using MagicaVoxel
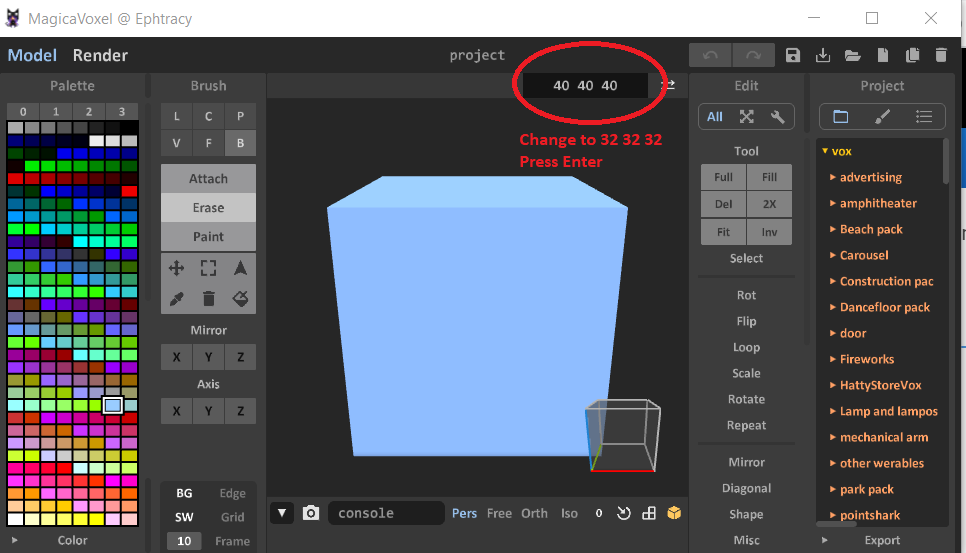
To create a vox model, you need MagicaVoxel. Download the latest version, install it, then open it up.
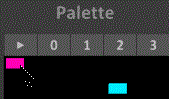
The first step is to set the size to 32x32x32 - you can do this by selecting the 40s on the top right, typing 32 and hitting enter.
You are now ready to use MagicaVoxel to create your own hat, snowboard, t-shirt, etc.
When making your item, the size and rotation are not really important since owners will be able to rescale and rotate the wearable when they want to wear it - click here to see how users can wear and customize their wearables.
Saving your vox
Once you've made your wearable, save it.
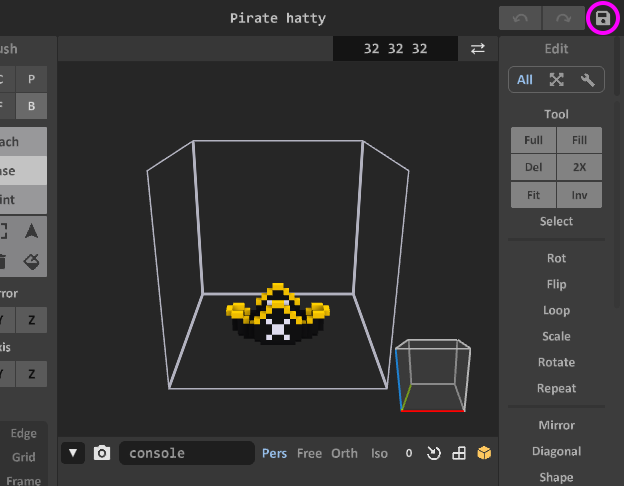
Make sure the canvas is 32x32x32!
Uploading your wearable
Your item is created and it is now time to upload it for review!
You have two choices:
- Mint your wearable to your collection (you'll need to create a collection first)
- Submit your wearable to a public collection
The pros of chosing option 2 instead of 1 is that you let someone else manage the collection and that person has to pay the minting fees. However, the collection owner is also eligible for royalty fees from OpenSea transactions.
Tips, scripts & tutorials
MagicaVoxel allows the use of scripts (shaders), has the ability to import certain file types to ease the creation process and can load color palettes, as well as easily create gradients.
Importing
To import a PNG or JPG, just drag it into MagicaVoxel (clear it beforehand though). You could, for example, import a pixel art face and then extrude it to your liking. If you go this route, you might want to downscale it to 32x32 beforehand (and if you do it in Photoshop, make sure to use Nearest Neighbor for the resample type).
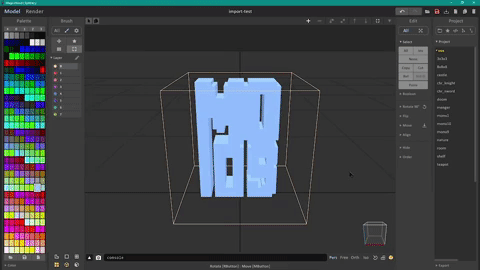
To import an OBJ, drag it into MagicaVoxel. When you import the file, MagicaVoxel may include a hidden layer, which you’ll have to erase - otherwise you won’t be able to import your vox into Cryptovoxels. Look at the GIF below to see how to erase.
Shaders and colors
Shaders go into the shader folder and palettes go into the palette folder. After you've loaded some shaders, they can be accessed either from the right panel or via the console on the bottom. This site offers a lot of different shaders to play with.
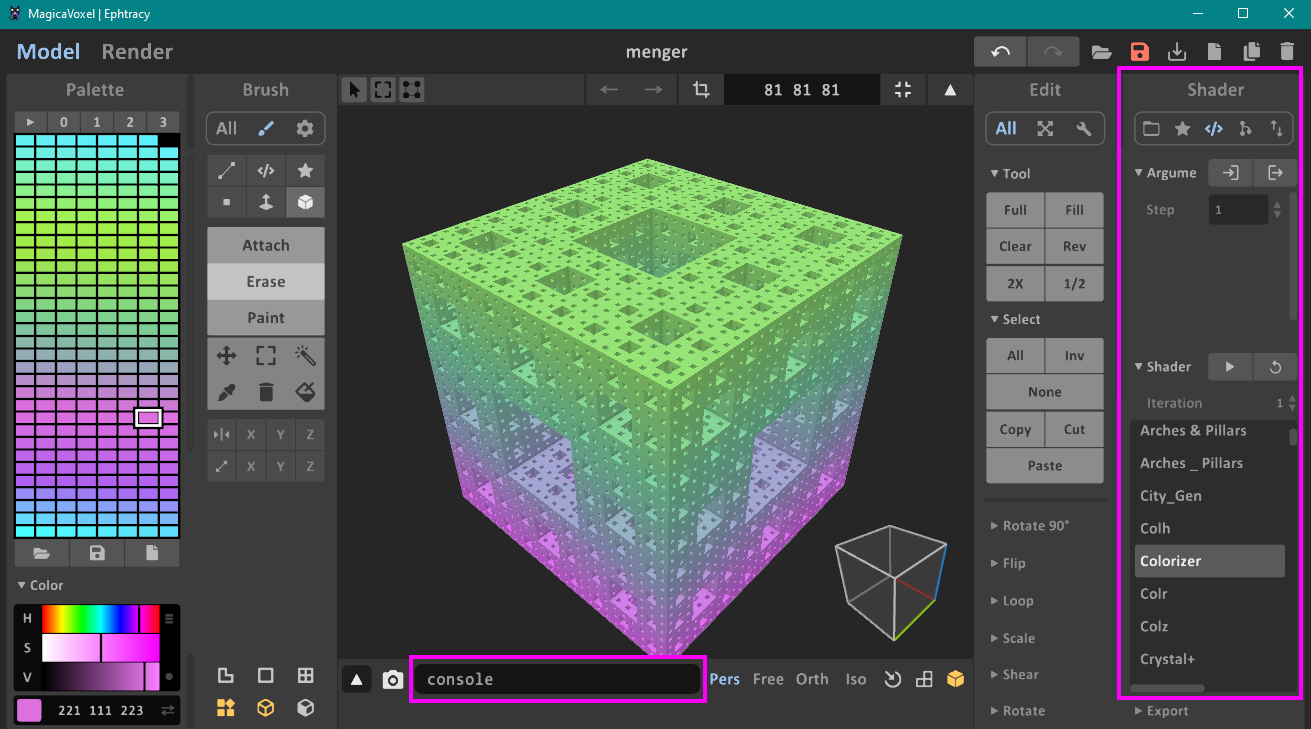
In order to create gradients, hold CTRL+ALT, then click/hold the starting color and drag it to the ending color.
Trying it on before minting
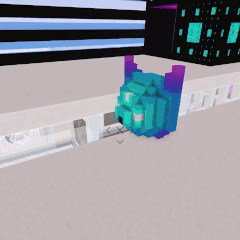
Although there is no official feature to try the wearable on first before minting, you can place the vox in your parcel (or a sandbox parcel) and walk into it to somewhat emulate it.
After dropping the vox in and adjusting the position/scale/rotation, hit C to go into third person and walk into it. It's not perfect, but it works.
Check out the customization section to see all the ways a player can attach wearables on themselves.
Having others try it on
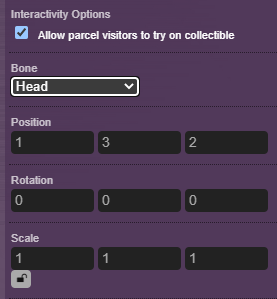
If you have the wearable already minted and is in your wallet, you can allow others to try it on before purchasing.
- Hit TAB or click the cubes near the top right
- Select Collectible Model and place it in your parcel
- Select the wearable under Your Collectibles
- Check the Allow parcel visitors to try on collectible checkbox
- Select the Bone
- Adjust the position / rotation / scale
- Test it out to ensure you look good
Glitched face
Stella figured out a way to make awesome glitched out wearables in Cryptovoxels. 😸
 To replicate this crazy effect, check out the tutorial here!
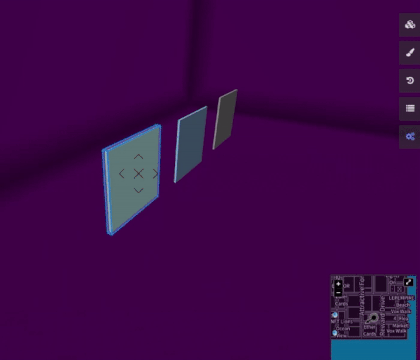
Flat wearable
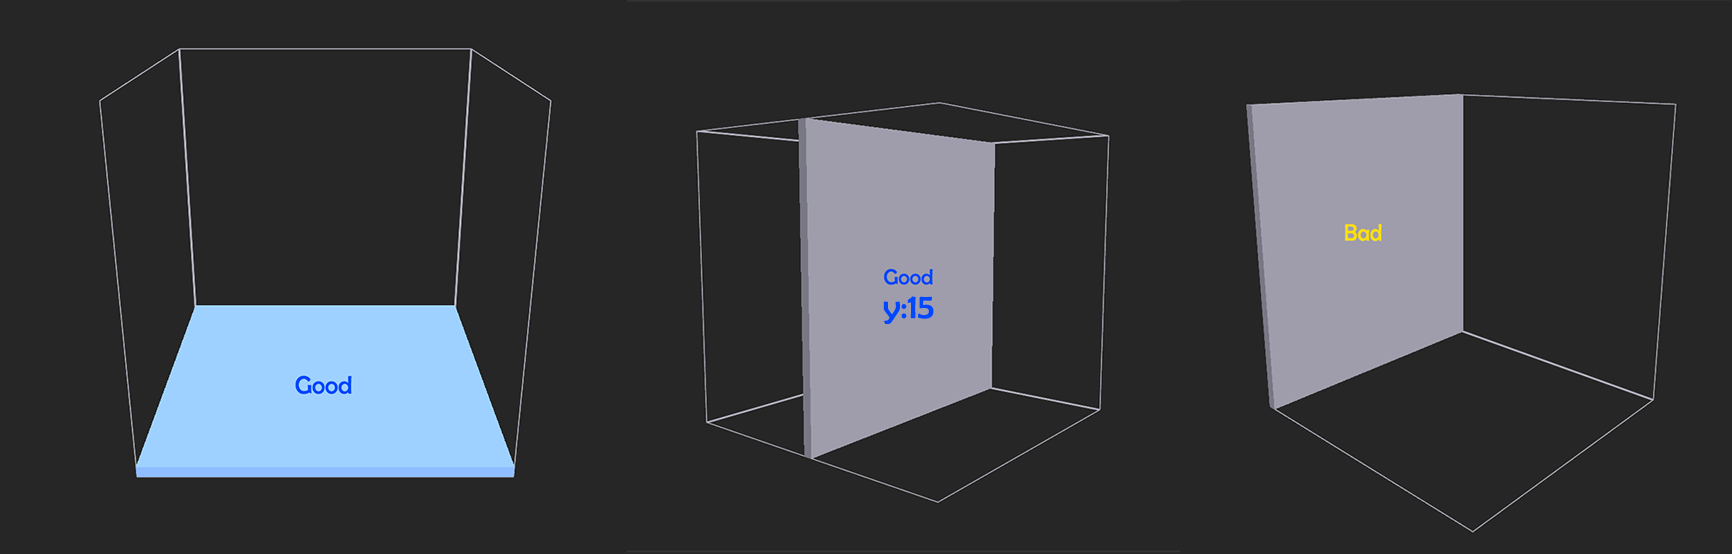
If you're planning on making a flat or thin wearable, you will have to create it a certain way in MagicaVoxel, otherwise scaling might look off. Below you can see three different VOXes that appear similar, but when scaled, one of them is clearly off (and moves as a result).
To make sure your flat wearable doesn't look funky while scaled, either make it on the "ground", or have it at the center point as shown below (which is y:15).
Tutorials
If you're completely new to MagicaVoxel, or just want to go more in depth, check out these resources:
- Written guide for beginners
- Quick start video (icons are from an older version)
- Detailed video (ignore the render part)
- Official resources (lots of good stuff)
3. Collections
A collection is a group of 3D NFTs that are spawnable in-world or wearable.
Having your collection created and whitelisted in cryptovoxels means you can create your own brand of collectibles (in this case wearables) based on the blockchain.
You can have players wear or place the collectibles of that collection in-world. They will also be able to find your collection and collectibles on the Cryptovoxels website and OpenSea. You'll also be able to manage aspects of your collection from Cryptovoxels & OpenSea.
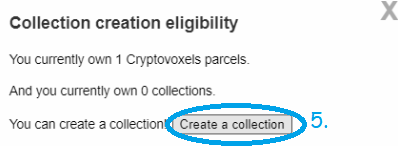
You're allowed one collection per parcel owned. If you do not own a parcel, you will have to submit to a public collection. The size of the parcel owned does NOT dictate the amount of wearables you can have in a collection.
Creating a collection
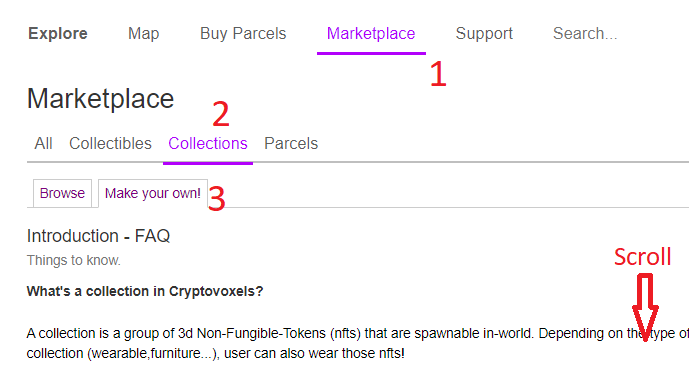
- Log into CV with your wallet and click Marketplace on the top bar
- Click Collections
- Click Make your own!
- Click Create a collection
- Click on the Create a collection button
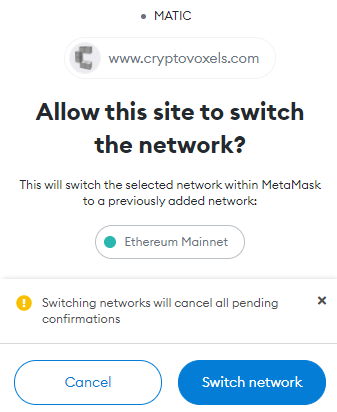
- Select the Chain Id and click the Next button

- Your wallet may ask you to switch networks, so click Switch network (ignore if you don’t see this message)
- Fill out the collection’s information, click the Save & Next button (you can modify the name, description and logo any time via the ⚙Admin page)

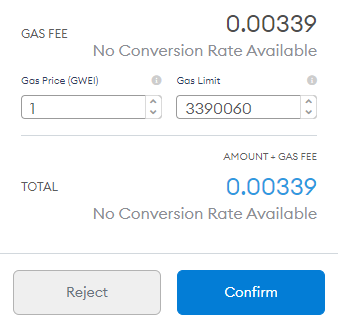
Name the contract, click the I assert… checkbox and the Upload And Deploy button to continue
You’ll need Matic on the Matic Mainnet (or ETH on the Ethereum Mainnet) to proceed with the next step, so once you have some available, click Confirm
- After it deploys successfully, a confirmation window will pop-up
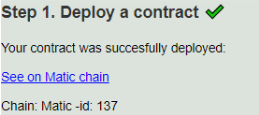
- Fill out the missing info

After the required info is added, click the checkbox, then click the Submit button
All the text should have cleared and a message with a green background should have appeared - click on the link that states Click here to see it!
You should now see your collection - click the ⚙Admin button and bookmark the page
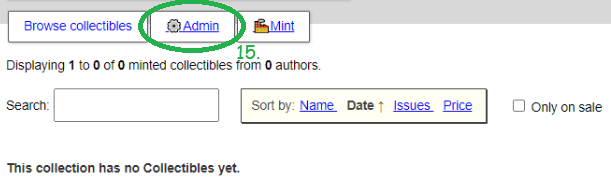
Congrats - you now have a collection!
All of your collections (and collectibles) can be found on here.
Minting a wearable
Now you're ready to mint! Head to your collection page and make sure you’re signed in (it’ll be something like https://www.cryptovoxels.com/collections/1). If you're submitting to a public collection, skip the next section.
Plan on minting shoes or something that requires the user to own two of them? Keep in mind that users will need to own two of your wearables then (meaning you may have to mint double the amount). This change was made around November 2021.
Polygon/Matic RPC
To ensure stability, we recommend switching your wallet's RPC for Polygon/Matic to https://rpc-mainnet.maticvigil.com/.

Upload to your collection
- Click the 🏭Mint button.
- Enter the Name & Description (do not touch the Owner info)
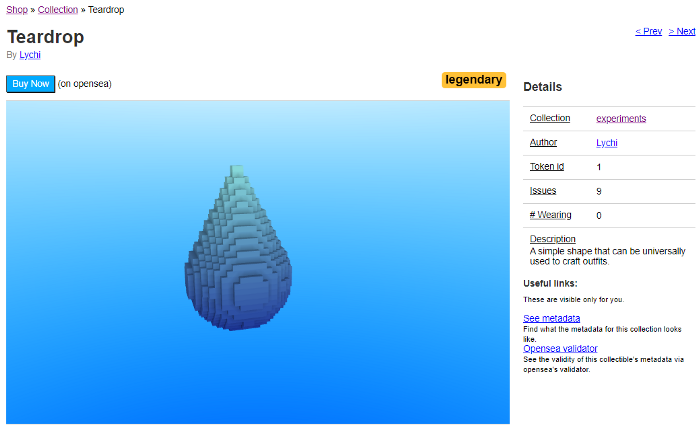
- Set the amount of IssuesRarity: 1–9 Legendary | 10–99 Epic | 100–999 Rare | ≥1000 Common
- Click the Choose File button and select your vox file
- Click the checkbox that agrees with the TOS
- Click the Submit button
- Scroll down, your submission will be under Collectible submissions - if you do not see it, hit the Refresh button
- Check to see if your Preview shows an animated gif
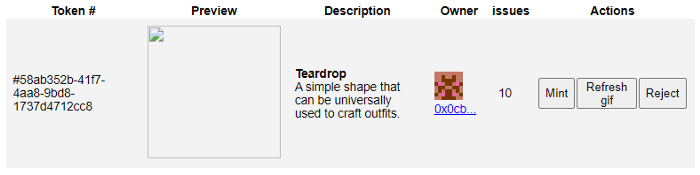
- If it looks broken, hit the Refresh gif button under Actions. You’ll see this window open up afterwards:

- If you got an ok, refresh the browser, then click 🏭Mint again and scroll down to look back at the submissions
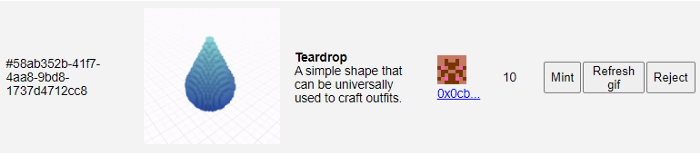
If everything looks good, click Mint. If something looks amiss, click Reject.
If you mint it, your wallet will pop-up to confirm the transaction, which will require a very tiny amount of Matic (or ETH) - click Confirm to proceed to mint.
![]()
- Under Collectible submissions, there will be a link to the right that states Collectible ready - click that

- You should now see your wearable on the Cryptovoxels page
Congratulations, you just minted your first wearable!
Go to here to learn how to put on wearables.
Submit to a public collection
If you don’t own a Parcel, you can always submit to a public collection.
- Head over to https://www.cryptovoxels.com/collections
- Click the Available to public checkbox
- Select a collection
- Click the 🏭Submit button

- Read the warnings, fill out the info and click the checkbox on the bottom, then click the Submit button
- You’ll now have to wait for it to get approved by the collection owner — you may want to send them a message through Cryptovoxels / Discord
- Once the wearable is minted by the collection owner, you’ll get a message on Cryptovoxels (you’ll see a red dot next to Inbox on the top if you get it)
Trading a wearable
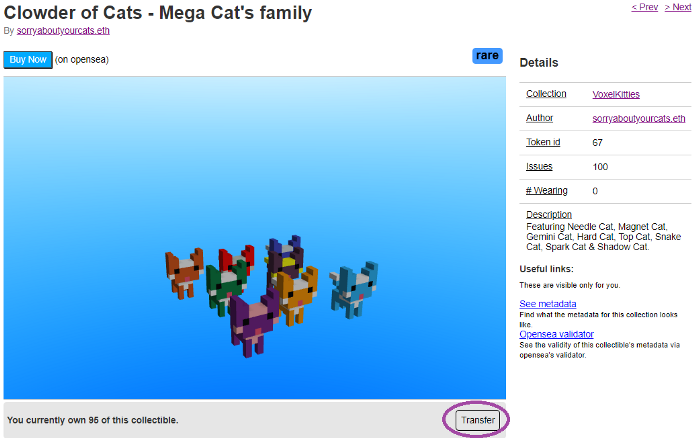
You can transfer wearables either on the Cryptovoxels website or on OpenSea.
Trading on Cryptovoxels
To transfer using the Cryptovoxels website, head to the wearable you want to send [e.g. https://www.cryptovoxels.com/collections/1/1] and click the Transfer button on the bottom. If you don’t see the Transfer button, it either means you need to switch networks on your wallet or that you do not possess any amount of that wearable.
A dialog will pop up asking who to transfer to and how many. Fill that out and hit the Transfer button.
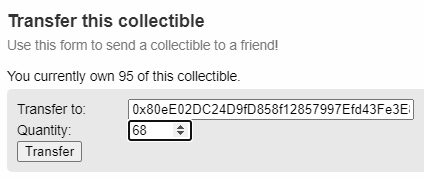
It’ll then ask to confirm the address - if it looks good, click the OK button. Your wallet will pop-up asking to confirm the transaction (Matic or ETH gas), click the Confirm button to continue. A dialog will show the transfer in process and then close.
Trading on OpenSea
If you’d prefer to send it over OpenSea, you can do so as well. Head to the wearable on OpenSea and click the Transfer button located on the top right.

If you don't see the transfer button, make sure you're logged in.
Selling on OpenSea
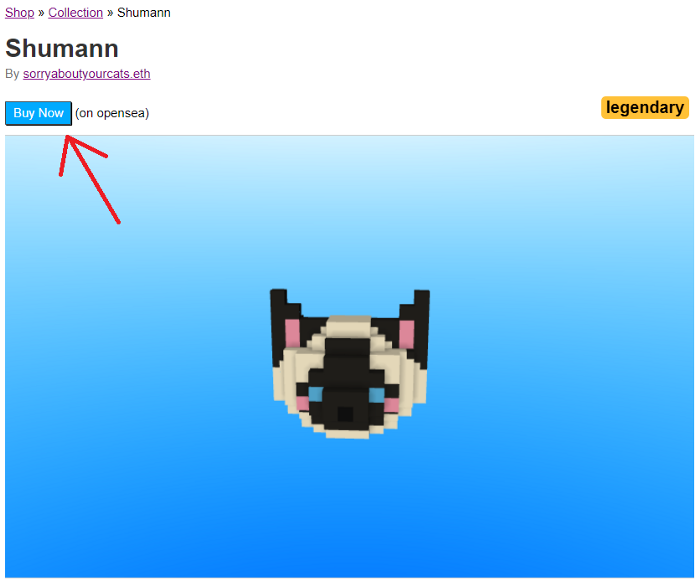
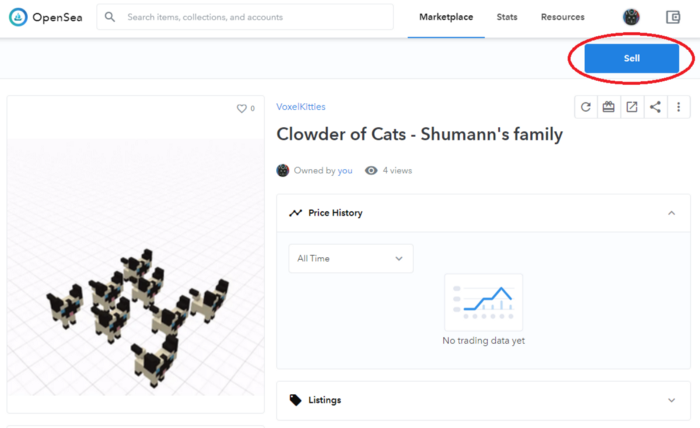
If you want to sell your wearable, you’ll have to price it on OpenSea. Go to an item in your collection on the Cryptovoxels page, then hit the Buy Now button.
On your listing in OpenSea, if you DO NOT see your wearable rotating around, you may have to click the Refresh metadata button. If it’s still not visible after waiting a minute, you may have to report this as a bug on the Cryptovoxel’s forum, or possibly wait a little longer.
You should now be on the OpenSea page with your wearable rotating around. Click the Sell button.
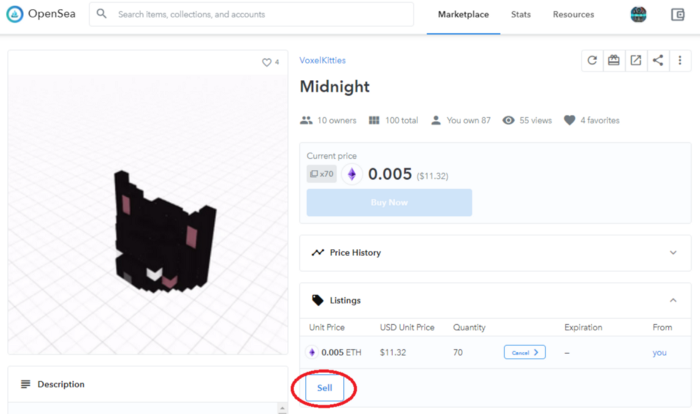
Keep in mind - after your wearable is posted for sale, the Sell button shifts downward, under Listings.
The Sell your item dialog will pop-up after hitting the Sell button. Put the amount, in ETH, for how much you’re going to sell your wearable for. Keep in mind OpenSea will take 2.5%. There may also be royalty fees involved too, but you shouldn’t see that now.
You can also set an end date to the sale, in case you want it listed for a limited time. If you want, click Schedule listing and set the end date.
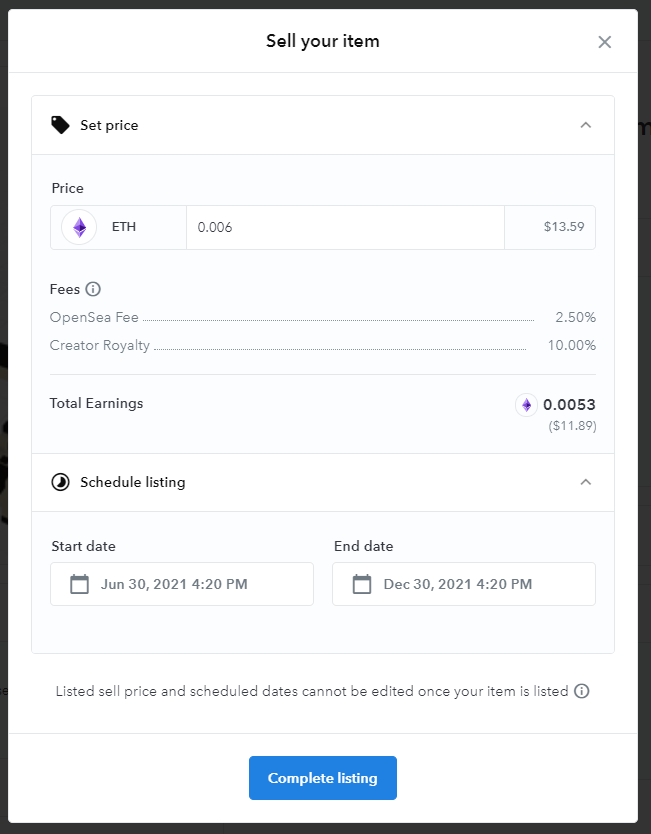
Click the Complete listing button when ready and your wearable will be listed for sale.
For Matic/Polygon collections, the ETH you receive will be PoS-WETH. If you don't see it on your wallet, switch networks or go here.
Customization & royalties
You can customize your collection on Cryptovoxels & on OpenSea. You'll also be able to set up royalties for your collection.
Customizing your collection in Cryptovoxels
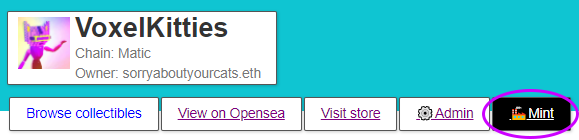
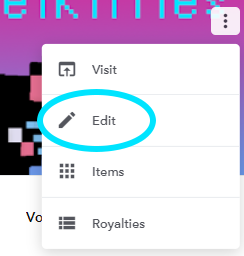
Go to your collection page and click the ⚙Admin button.
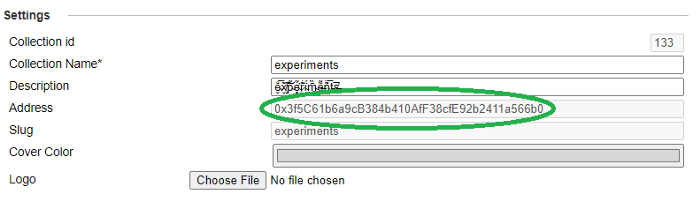
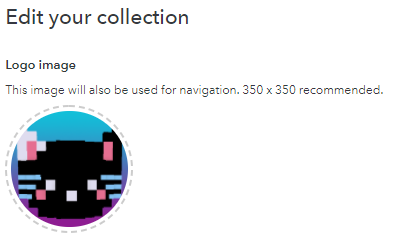
Under Settings you get the ability to change your Collection Name, Description, Cover Color and Logo.
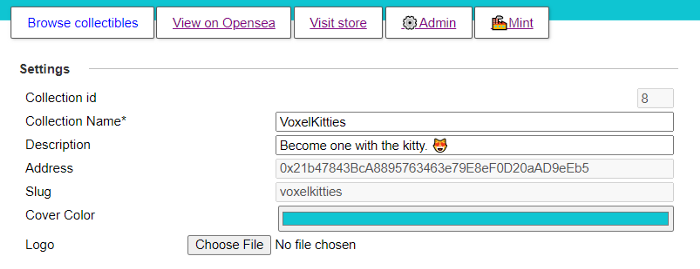
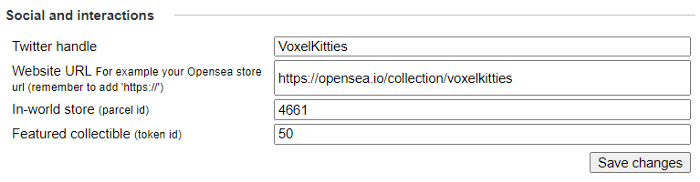
Under Social and interactions you can add your Twitter handle, OpenSea store, In-world store (if you own a parcel, enter the ID) and Featured collectible (enter the ID of the wearable). If you enter this all, you’ll see your Twitter feed and featured collectible on the right hand side on the collection page and two new buttons (View on Opensea & Visit store) will show.
Customizing your collection in OpenSea
Before we start customizing on OpenSea, we have to let them know you are the actual owner, which won't be instantaneous. Copy the address from your collection’s Admin page.
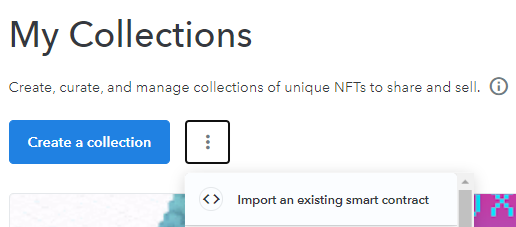
On OpenSea go to the Collection Manager, click the kebab menu and select Import an existing smart contract.
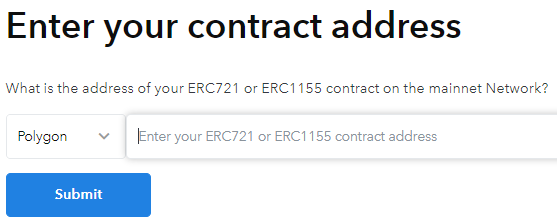
Click the first button, Live on a mainnet, then click the dropdown on the left, select Polygon (for Matic) or ETH, enter your address and click the Submit button.
Once submitted, you have to wait until someone manually connects the collection to your account. You’ll know if you are connected once you are able to edit your collection on the Collection Manager page.
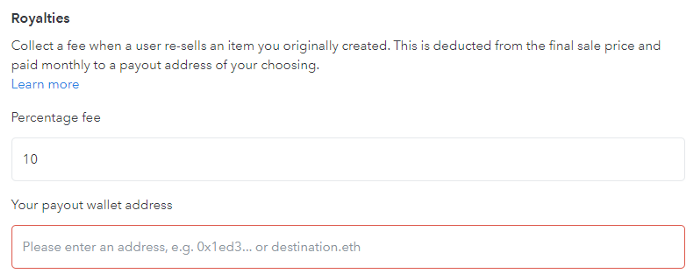
Once your account is connected, you’ll be able to edit your collection information, including adding a Logo image, Featured image & Banner image.
If you scroll down you’ll get to the Royalites section. From here, you can put up to 10% for the fee and enter your payout wallet address.
Have fun customizing your collection!
Wearable attributes
You can add up to three attributes to your wearables. This is optional but useful and fun.
Setting up attributes
Go to your collection page and click the ⚙Admin button, scroll down and go to the Custom Attributes section, then click Add a trait.

Click the dropdown menu and select the type.

Once you have your attribute(s) set up, click Save changes.

Applying attributes to existing wearables
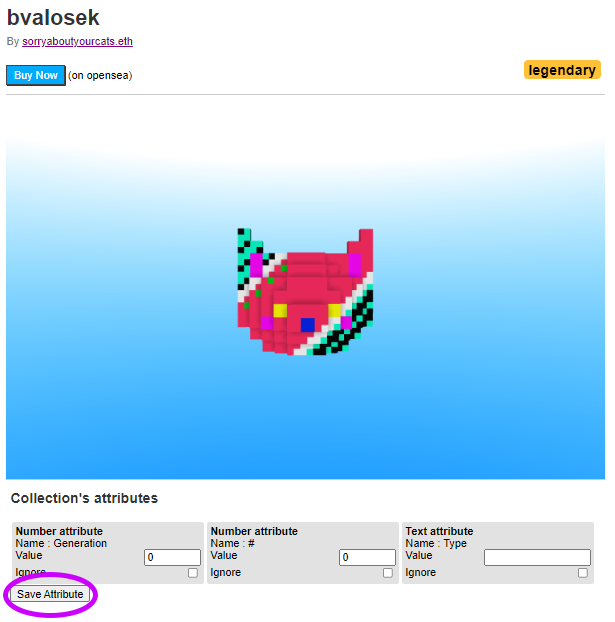
After custom attributes are set in the collection, attributes can be added to existing wearables. Go to the wearable’s page on Cryptovoxels and scroll down, then add the info and hit the Save Attribute button.
If you do not want to use one of the attributes for the wearable, click the Ignore checkbox in the attribute box.
Applying attributes to new wearables
After custom attributes are set in the collection, attributes can be added during the wearable upload process.

What it looks like on OpenSea
Below you can see how it looks like on OpenSea. The AUTHOR, RARITY & VOX Properties were automatically inputted by Cryptovoxels and TYPE was manually added by an attribute. Under Stats you can see the # & Generation that was manually added as well.

The other benefit of adding attributes is helping people filter and sort through your collection.

Rarity levels
The number of issues of your wearable will dictate its rarity.
Common = Greater or equal to 1000 issues Rare = Greater or equal to 100 issues and smaller than 1000 Epic = Greater or equal to 10 issues and smaller than 100 Legendary = Greater or equal to 1 issues and smaller than 10